A single mistake in racking installation can cost your Los Angeles warehouse thousands in racking repairs, downtime, and potential safety violations. When you’re investing in a new pallet racking system, understanding the whole installation process helps you prepare properly, minimize disruptions, and ensure everything meets California’s strict safety standards.
This comprehensive guide walks you through every phase of professional pallet racking installation in Los Angeles warehouses. You’ll learn what happens before, during, and after installation day, and what you need to do to prepare your facility for a smooth, efficient racking installation.
Pre-Installation Planning Phase
Professional installation starts way before anyone visits your warehouse. The planning phase determines whether your warehouse racking system will function safely and efficiently for the upcoming years.
Your installation team conducts an initial warehouse assessment to measure your space, evaluate ceiling heights, and identify potential obstacles like sprinkler systems or structural columns. They measure door widths to ensure equipment can easily get in, check aisle widths for forklift clearance, and note any floor irregularities that could affect the racking installation.
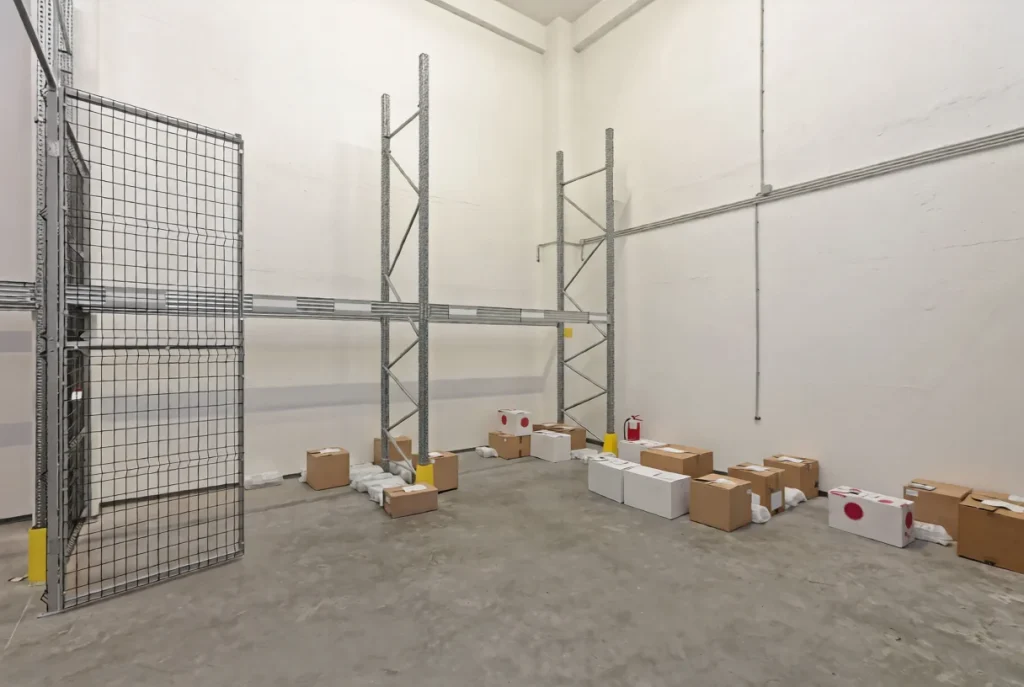
Floor load capacity evaluation becomes critical in Los Angeles warehouses.
The concrete slab of your warehouse must support the combined weight of your complete racking system, stored products, and dynamic loads from forklifts. Engineers calculate load points where uprights anchor to the floor and verify your slab thickness meets standard requirements.
This planning phase includes CAD layout design, which shows exact rack placement, load calculations based on your inventory weights, seismic zone analysis for California compliance, preparation of permit application for Los Angeles County, and timeline development, which is usually decided after analyzing your operations schedule.
Planning usually takes 1-2 weeks for straightforward racking installations. Complex projects involving seismic calculations or structural reinforcement can take 3-4 weeks.
Pre-Installation Preparation: What You Need to Do
The preparation you do directly impacts the speed and quality of the racking installation. Clear the rack installation area completely, removing all existing storage, equipment, and debris from where racking will be installed, plus an additional 10-foot perimeter. Half-cleared areas always slow down installation speed and create safety hazards.
Verify your floor conditions meet installation requirements.
Sweep and clean the concrete floor thoroughly so rack installers can inspect for visible cracks or damage that could affect the anchor placement. Fill floor cracks that are wider than 1/8 inch and repair damaged concrete sections.
Coordinate installation timing with your warehouse operations by scheduling around peak shipping periods when possible, planning for partial shutdowns if needed, notifying the staff about restricted areas and timeline changes, and arranging alternative storage for products that need relocation.
Ensure the rack installers have proper access, including parking for work trucks near loading docks, electrical outlets for power tools, restroom facilities, and clear paths from receiving areas to actual installation zones.
The Installation Day: Step-by-Step Process
Phase 1: Site Setup and Safety
Installation teams arrive early to set up their work area and conduct safety briefings. The lead walks through the work site, verifying measurements match CAD drawings and identifying any changes since the planning phase. Safety barriers go up first, which creates clearly marked work zones using caution tape, safety cones, and barriers that prevent unauthorized access.
Installation teams unload tools, anchors, and racking components, organizing materials near where they’ll install each section. The crew lead carries out final measurements, marking exact locations where upright frames will anchor to the floor.
Phase 2: Foundation and Anchoring
Anchor installation creates the foundation for your entire racking structure. Installation crews mark precise drilling locations using the approved CAD layout, measuring multiple times to ensure work accuracy. In seismic zones like Los Angeles, anchor placement follows strict spacing requirements that affect the system’s earthquake resistance.

Installers drill holes for concrete anchors using rotary hammers or core drills. Hole depth and diameter must match anchor specifications exactly. Crews vacuum debris from each hole before inserting anchors to ensure clean, tight fits.
Proper anchoring determines whether your racking will survive a seismic event or not. California requires specific anchor types, spacing, and embedment depths based on seismic zone classifications. Los Angeles warehouses typically fall under high seismic zones requiring reinforced anchoring systems with epoxy-set anchors rated for seismic loads.
Rack installers torque each anchor according to manufacturer specifications using calibrated torque wrenches. Quality rack installation companies document torque readings for every anchor, providing you with certification records for compliance files.
Phase 3: Frame Assembly
With anchors set, crews start assembling upright frames. Each frame consists of two vertical columns connected by horizontal and diagonal bracing, which provides structural rigidity. Installers work methodically, building frames row by row to maintain stability as the system grows.

Rack Installers use precision levels to make sure frames stand plumb in both directions. Out-of-level frames create uneven load distribution that can cause premature wear or rack failure. Shims under base plates compensate for minor floor irregularities, keeping frames within tolerance even on less-than-perfect concrete.
Phase 4: Beam Installation
Load beams transform upright frames into functional storage racks. Installers mark beam heights on upright columns according to your specified level spacing. Beam connectors securely lock beams to upright columns with safety clips or locking pins that prevent beams from accidentally dislodging during forklift operations.

Installation crews pay special attention to beam alignment. Professional rack installers use precision measuring tools to ensure beams across rows line up within 1/4 inch, creating even load distribution and smooth forklift operations.
Phase 5: Final Assembly and Racking Inspection
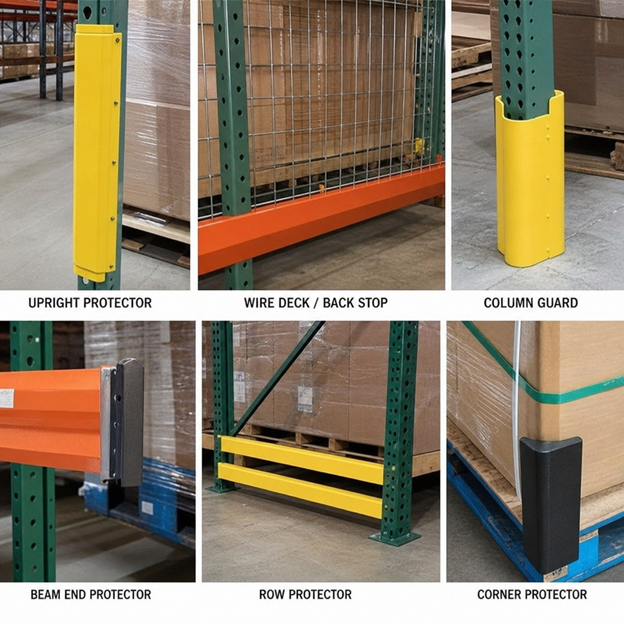
When frames and beams are installed, crews add wire decking or pallet supports, column protectors to shield upright frames from forklift impacts, and end-of-aisle protection preventing forklifts from striking rack ends.

Professional rack installers conduct rigorous inspections before signing off on completed systems. The crews lead checks that all connections are intact, safety devices are engaged, and components are aligned correctly. They verify anchor torque values and document the whole installation with photos, anchor torque records, and as-built drawings.
Post-Installation: What Happens Next
Your final walkthrough includes a detailed review of the newly installed racking system. The installation supervisor explains load capacities for each level, demonstrates proper loading techniques, and points out safety features your staff should understand.
The training of safety features and usage protects your investment and your workers. Training covers proper pallet placement, forklift approach angles, clearance requirements, and what to do if any unfortunate event occurs.
The document you will receive includes as-built drawings, anchor torque certification records, load capacity calculations with engineering stamps, warranty information, maintenance and inspection schedules, and contact information for service and repairs.
Mostprofessional racking installations include 1-year warranties on workmanship and materials. California regulations require annual professional inspections at a minimum, but monthly visual inspections help catch damage early.
Los Angeles-Specific Considerations
Installing pallet racking in Los Angeles warehouses requires compliance with California’s building codes and seismic regulations.
California seismic zone requirements significantly impact pallet racking design and installation. Most of Los Angeles falls into Seismic Design Category D or higher, the most demanding classification. These zones require proper engineered seismic bracing systems, reinforced anchor patterns, and specific column-to-beam connection designs that resist earthquake forces.
Building code compliance follows the California Building Code (CBC), with Los Angeles County enforcing additional local amendments. Your installation must meet CBC Chapter 23 requirements for steel structures and NFPA fire code clearance standards. Permit processing times vary by Los Angeles County jurisdiction. City of Los Angeles typically takes 2-4 weeks for plan review with scheduled inspections within 3-5 business days. Unincorporated LA County requires 3-5 weeks for plan review. Independent cities like Torrance or Long Beach may take 2-6 weeks, depending on workload
Final Words
Professional pallet racking installation transforms your Los Angeles warehouse into efficient storage capacity, driving business growth. Professional pallet racking installers follow a systematic approach that creates safe, compliant racking systems that meet California’s demanding seismic and building code requirements.
Choosing experienced racking installers who understand Los Angeles permitting requirements, seismic zone challenges, and active warehouse operations eliminates the headaches of racking installation and provides complete peace of mind. Professional installation comes with warranties, engineering certifications, and documentation that protect your overall investment.
Ready to install a professional pallet racking system in your Los Angeles warehouse? Los Angeles Pallet Racking provides expert installation services throughout Southern California. Our certified crews handle everything from permit applications through final inspection. Contact us today for a free consultation and detailed installation quote.
FREQUENTLY ASKED QUESTIONS
Do I need to completely shut down my warehouse during installation?
Not necessarily. Most of the Los Angeles warehouses maintain their usual operations during installation by phasing work in sections. Professional rack installers establish safety barriers that separate active operations from installation zones.
What permits are required for pallet racking installation in Los Angeles?
Building permits from your local jurisdiction are required for most of the installation projects. Permits require engineered drawings, seismic calculations, and structural load analysis. Plan review typically takes 2-5 weeks, depending ont he jurisdiction.
How much does professional pallet racking installation cost in Los Angeles?
Racking Installation costs vary based on facility size and system complexity. Expect $75-125 per hour per installer with 2-3 person crews. Small warehouse installations might cost $2,000-5,000 for labor, while large facilities reach $15,000-40,000+. Additional costs include permits ($800-2,500) and equipment rental ($300-1,200 per day).